Not the boss you’re looking for? Check out the Aberrus, the Shadowed Crucible Overview for a list of all bosses and guides!
All of these guides are being tuned as new information about the raid is released. All information gathered from the PTR and subject to change as the raid is nerfed/buffed!

Introduction
This is a 2 phase encounter. Phase 1 involves preventing adds from becoming Overwhelming and cleaving damage onto a boss that jumps between platforms trying to disrupt you. Phase 2 the boss enrages, heals back up, and must be defeated in singular combat!
Positioning
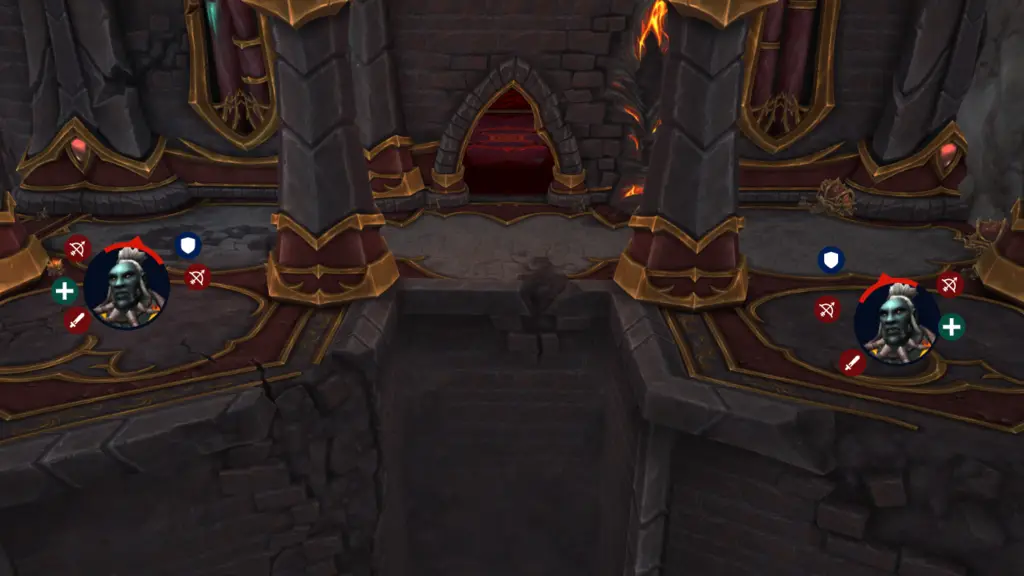
The goal of phase 1 is to stop the assault. You will split into 2 groups. Each groups on their own platform. You will prioritize killing Wall Climbers, the Mystics, and the Boss( If he is currently on your platform)
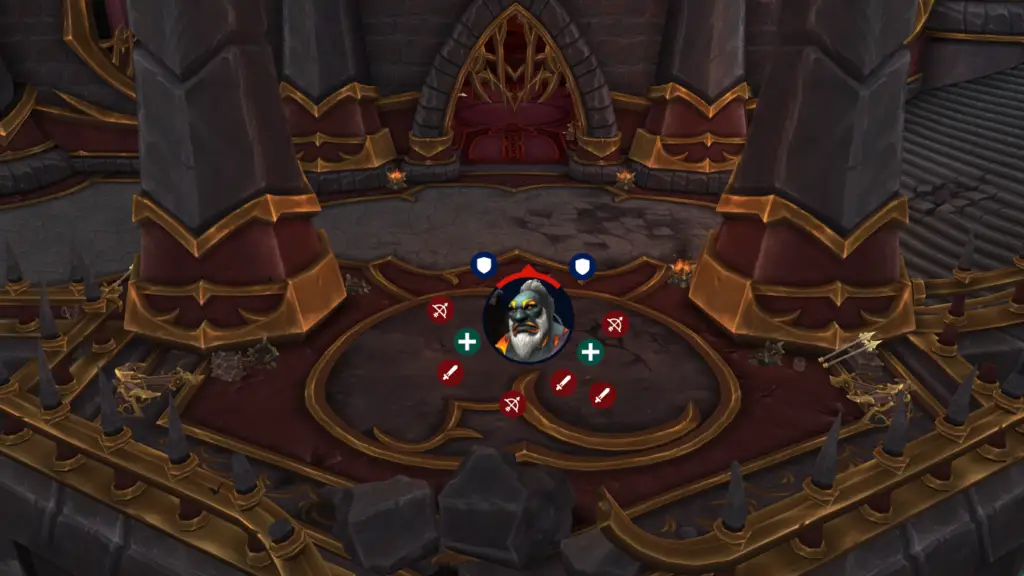
In phase 2, both groups meet to fight Warlord Kagni on his own. Enraged at his onslaught being stopped, you will have to dodge some fiery cleaves, and soak some raging slams!
Important Notes
This boss encounter is mostly a focus on Add Management. The entirety of the first phase is comprised of prioritizing and killing certain adds, while the 2nd phase focuses on the boss. I will not be pointing out all abilities of this fight, as what happens when is largely dependent on how quickly you are clearing adds. I will however, describe the flow of both phases, and what to look out for!
Phase 1
Phase 1 will start when the boss is damaged to the point of beginning the assault. Split your groups, and go to each platform/balcony overlooking Aberrus. Each platform will have rocks that spawn when the boss lands on your platform. DPS should pick up these rocks and toss them off the wall at the Yellow Arrows using the Extra Action Button.
Kill adds as they spawn, and help your tank pick them up. Avoid standing near the edge to minimize picking up adds or getting knocked off, and interrupt/stun everything you can.
The boss will leap to the other side every 100 energy, spawning more rocks. The tank’s priority is picking him up, while tagging Wallclimbers as they rush the gate.
Phase 2
When the boss reaches 15%, he enters phase 2. He will leap to the gate and heal himself up, and get a stacking fire damage AoE.
The boss does a conal cleave, so no one but the Tank should be in front.
He will also cast Catastrophic Slam. This is the major mechanic and requires groups to stack. I recommend using the groups that you set for P1 and alternate to reduce damage taken.
Role-Specific Mechanics
There are several things that each raider should be aware of and prepared for. Check below for what each role is focusing on during the fight!
Tanks
Tanks will be responsible for rounding up adds in phase 1, and holding the boss in phase 2. Tank swap with every with every Flaming Cudgel in phase 2.
KEEP THE BOSS FACED AWAY FROM THE RAID AT ALL TIMES.
Healers
This is a pretty easy fight for healers. No special dispels or huge raid wide spikes, just a lot of little things to keep up with. Keep an eye on how many adds are up and help throw rocks when you can.
Damage
Kill adds as quickly as possible, and kill adds asap. This is a very AoE intense fight, so i’d suggest an M+ style build. Below is a suggested kill list for adds.
- Magma Mystic (until the shield is broken)
- Obsidian Guard
- Flamebound Huntsman
- Boss
- Wall Climbers
Conclusion
You’ve prevented the Zaqali from rescuing their Elder. Now it is time for us to put an end to whatever is powering the Forges of Aberrus!