Not the boss you’re looking for? Check out the Aberrus, the Shadowed Crucible Overview for a list of all bosses and guides!
All of these guides are being tuned as new information about the raid is released. All information gathered from the PTR and subject to change as the raid is nerfed/buffed!

Introduction
In the Amalgam Chamber, you’ll face a 2 phase encounter. An elemental of Shadow, and Elemental of Fire, and a horrible Amalgam of Shadowflame! Phase one is against 2 spread out targets, and phase 2 is a DPS race against a single target.
Positioning
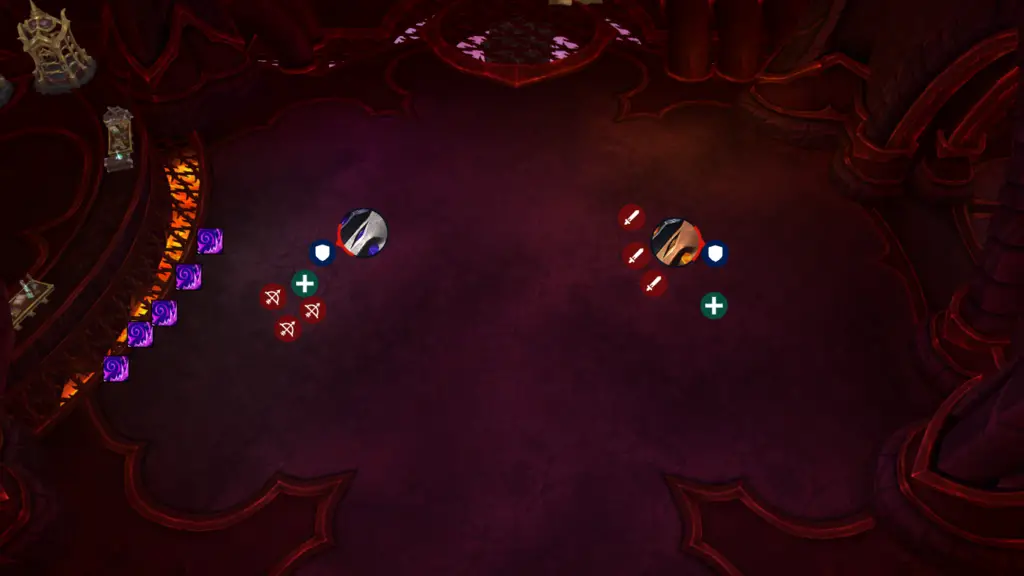
In phase 1, split the raid evenly into 2 groups. A tank on each side, and the raid spread loosely on each half of the room.
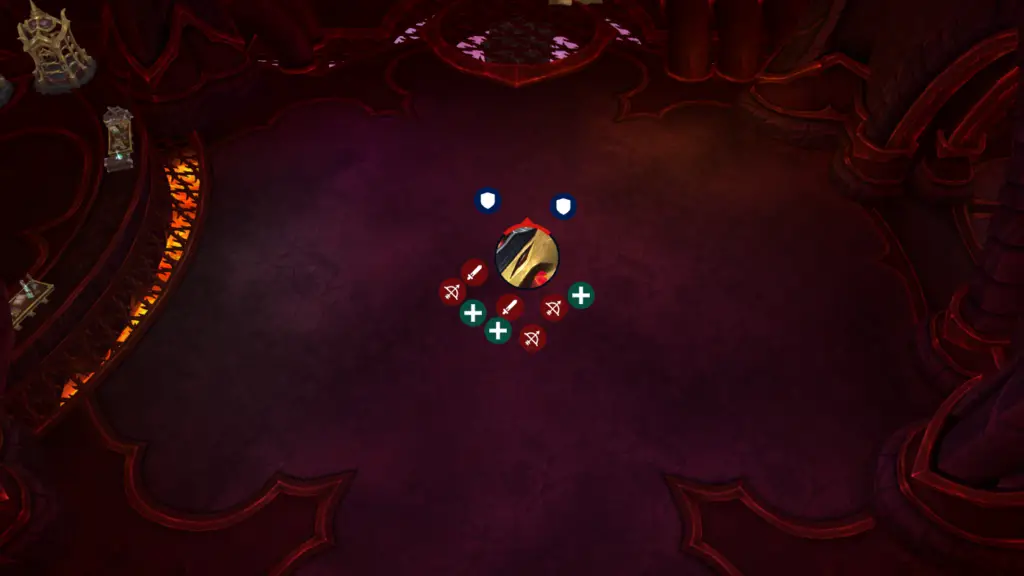
In phase 2, the tanks will come to the middle and unite the groups as the Elementals form into the Shadowflame Amalgam boss! Ensure to face the boss away in Phase 2. Stack loosely around the boss and prepare to soak/dodge mechanics as necessary.
Important Abilities
There are 2 phases in this fight, with two groups of Mechanics in P1 to keep track of, and a single set in P2.
Phase 1
Void Boss Abilities:
Corrupting Shadow– Passive stacking debuff. Reduces max health and deals damage per stack. Stacks until bosses swap.
Coalescing Void– The Elemental targets players with a bomb.. The damage is based on proximity. Move as far away as possible from your raid team.
Umbral Detonation– A DoT debuff that will also spawn a puddle. Stack these near the edge of the room on whichever side the shadow boss currently is being fought.
Shadows Convergence- Orbs spawn behind players and move towards the boss. They will deal massive damage, so keep an eye on your back and dodge as necessary.
Shadow Spike– Stacking tank debuff that does increasing damage. On the PTR you can use an immunity effect to negate the stacks.
Fire Boss Abilities:
Blazing Heat– Passive stacking debuff. Reduces max health and deals damage per stack. Stacks until bosses swap.
Fiery Meteor- A large AoE similar to the Primal Council. Multiple players will need to soak this to mitigate the damage to the effected players. (Players with immunities can mitigate this completely as of the PTR testing.)
Molten Eruption- Small swirlies that spawn around the boss. Soak these swirls to prevent raid wide damage.
Swirling Flame- The boss targets a random player and unleashes a cone of tornados. Dodge these.
Flame Slash- Stacking tank debuff that does increasing damage. On the PTR you can use an immunity effect to negate the stacks.
Phase 2
Unleashed Shadowflame: Many of the bosses abilities have combined, doubling the complexity and lethality!
Shadowflame- Passive stacking debuff. Reduces max health and deals damage per stack. This is your soft enrage effect.
Gloom Conflagration- A large AoE. Soak the AoE to reduce damage.(Fire Side P1 Mechanic). Once it explodes, it leaves a Coalescing Void (Void Side P1 Mechanic). Drop the initial swirly far away, so that players can move away from the orb to reduce damage taken afterwards.
Blistering Twilight- Boss will target random players with an AoE that causes them to drop puddles away from the raid (Void Side P1 mechanic), while simultaneously launching tornados around the raid (Fire Side P1 Mechanic.).
Convergent Eruption- The Amalgam will drop swirlies that must be soaked (Fire Side P1 Mechanic). As soon as the soak is over, orbs will spawn and travel to the boss. These must be dodged. (Void Side P1 Mechanic)
Crushing Vulnerability-Tank Swap Mechanic. Increases Shadowflame damage by 200% for 25 seconds. Immediately followed by Shadowflame Burst. (Tanks must swap AFTER the crush, but before the Burst.)
Shadowflame Burst- Conal Shadowflame cleave. Targets the tanks, so don’t stand in front of the boss.
Role-Specific Mechanics
There are several things that each raider should be aware of and prepared for. Check below for what each role is focusing on during the fight!
Tanks
Tanks will have to swap the bosses around 50% health in P1, and after every crushing vulnerability in P2. It’s a good rule of thumb to keep the boss facing away from the raid at all times, regardless of the Phase.
Healers
This fight involves a ton of moving, and people soaking specific mechanics that either deal damage to themselves, or the raid. Pay attention to callouts and use raid CD’s as necessary. The longer the fights go, the more likely people are to get 1 shot.
Damage
Keep your damage equal during phase 1, and follow mechanics. There are a ton of things that will either wipe your raid, or outright kill you if you do not pay attention. Help your healers and pop CD’s as necessary.
Conclusion
This fight took a huge amount of coordination. I hope you guys were able to use this guide to your advantage! With the defeat of the Amalgamations, it’s time to vanquish something long forgotten!